Tips of Getting the Best Sound Out of Your 2-Channel Music System
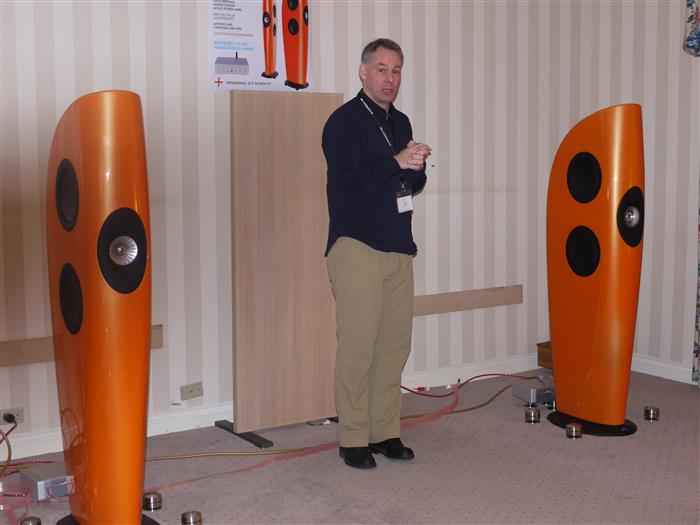
Above: Roy Gregory of www.TheAudioBeat.com presenting a seminar about how to setup and optimize your audio system.
It is a remarkable fact of hi-fi life, that people buying audio systems put a huge amount of effort into selecting the equipment that will eventually constitute their system – and having done so, consider the job done. It’s a tendency that has been reinforced by the preponderance of equipment reviews that appear in magazines, which heap additional emphasis on to specific equipment and its virtues. The role of a dealer as an adviser and installer has been marginalized, and the importance of system set up and what many customers consider to be ancillaries (cables, racks, etc.) has been belittled. Yet, in reality, while great cables or supports can’t make up for bad equipment, poorly chosen cables and supports can effectively destroy the performance of even the best electronics and speakers. Selecting the electronic boxes that will build an audio system doesn’t deliver guaranteed performance: what it does deliver is potential performance – potential that has to be realized through careful set-up and system optimization.
It’s easy to underestimate just what a dramatic impact set-up has on system performance. It really is make or break. Yet you regularly hear customers saying things like, “It’s only a cable – how can that make much difference?” Simply swap one cable in a system and it won’t – which is what helps breed the complacency. But, follow a few simple set-up rules and you can transform the performance of almost any system, regardless of price.
The problem is that knowing this and explaining it are two different things. Brought up on an unremitting diet of “Box Is Best”, most customers are unwilling to consider the possibility that they might have made a misstep, or that their expensive collection of electronics isn’t actually delivering the performance they’ve already paid for. The best way to really make this point is to demonstrate it, so with that in mind we arranged a series of System Set-Up seminars at the 2012 Toronto Audio Video Entertainment Show (known as TAVES). Laid out below are the basic steps that we followed in those seminars – the A, B, C of system set-up if you like. This isn’t intended as a detailed set-up guide: rather, it’s an indication of broad strategy and the steps you need to take if you are going to really hear what your electronics and speakers can do. So let’s start at the beginning…
The System and the Initial Setup
During the seminars, Roy used two sets of identical electronics, allowing comparisons to be made between different supports and cable topologies.
What we were setting out to do was lead an audience through multiple set-up steps in a little over an hour. That takes considerable organization, and more than one set of identical electronics, allowing comparisons to be made between different supports and cable topologies.
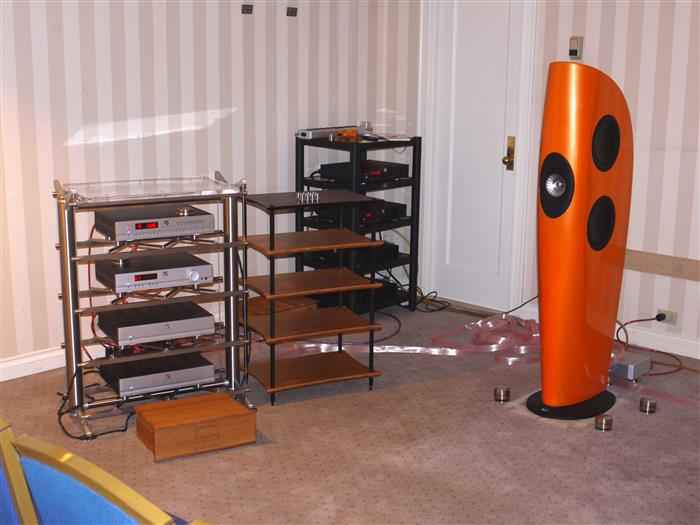
The system we started off with comprised of the Simaudio Moon 360D CD player, Simaudio Moon 350P Pre-amp, Simaudio Moon 400M Mono-blocs and the KEF Blade Loudspeakers.
Cables: We used a mixed selection of power cords from Nordost, vdH, Kimber, TCI and Music Works, along with a Music Works distribution block. Interconnects came from Reference Cables and Hovland, while the speaker cables were a top of the line vdH from several years ago. The specific identity of the cables wasn’t important, just the fact that I had as many different brands as possible within a single system – that’s what did the damage, not whether or not these were good or bad cables per se.
Rack: A welded steel Target HF570 with glass shelves.
Music used – I used the following tracks to introduce the system:
Julia Fischer – Bach Partita No. 2 for solo violin [Pentatone PTC 5186 074]
Buddy Holly – True Love Ways [From The Original Master Tapes, Geffen UICY-6045]
Cat Stevens – Hard Headed Woman [Tea For The Tillerman, DeLuxe Edition]
These sounded nice enough. Carefully selected, not too dynamic and good basic recordings, they sounded fairly acceptable – which was really the point. By choosing material carefully, you can make almost any system sound at least reasonable. Then I showed what the system wasn’t doing; the track used was the Las Cuevas De Mario by the Art Pepper Quintet [Smack Up, Analogue Productions CAPJ 012]. Its deep, evenly paced bass line and apparently simple rhythmic patterns quickly revealed the loose, disjointed bottom end, inconsistent dynamic range and lack of spatial and temporal coherence. Shorn of the rhythmic underpinning so vital to the track’s sense, it simply fell apart – musically repetitive, turgid and boring.
STEP 1
The first change we made was to move the speakers, each by about half an inch, to show the importance of precise positioning.
As soon as we did this, the music locked together. The bass gained shape and structure, but more importantly, started to play in time with the piano which itself became more urgent and incisive. The drums took up their proper place, spatially and musically, providing off-beat accents and fills, so that when the brass entered, it was over and in response to, a firm rhythmic setting. Now, the band actually sounded like they were playing together and the track started to take on some musical sense and shape.
Speaker placement is absolutely critical to performance, balancing the bottom end of the speakers against the bass reinforcement provided by the room. Equally important to large speakers (which don’t need too much reinforcement) and small speakers (that need as much as possible) it is crucial to achieving convincing weight, balance and integration. If your speakers are going to sound as good as they can, you really need to work on their set-up. But the really important point to realize is that until your speakers are positioned “just so”, they will hide the inadequacies of the rest of the system – and the benefits of any changes you make to overcome them. Our 2013 TAVES seminars covered speaker set up specifically, and you can read about it at http://www.theaudiobeat.com/blog/system_setup_seminars.htm.
STEP 2
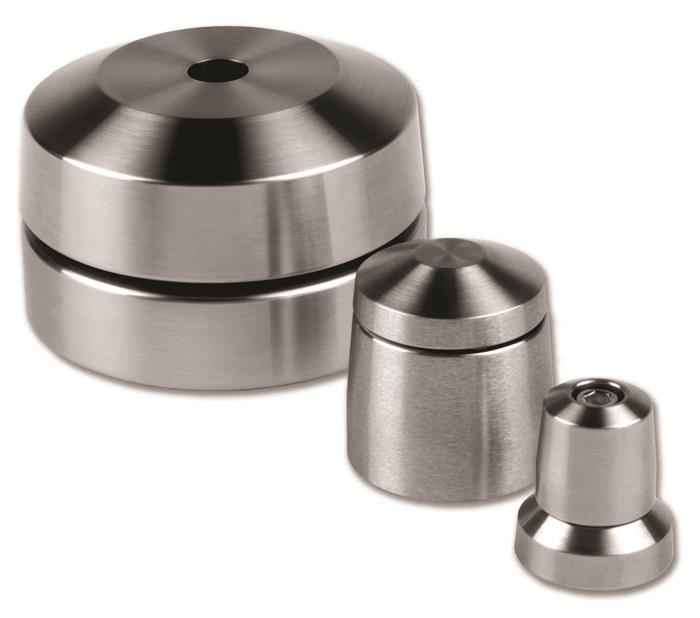
We lifted the speakers, each on a quartet of Stillpoints Ultra 5 feet/bases. As well as improving coupling to the floor, these allowed us to set the vertical and rake angles for the KEF Blade speakers.
The purpose of this step was to open the window on system performance as wide as possible, allowing us to really hear the impact of changes made upstream. Unfortunately, opening the window wide doesn’t mean you’ll like the view. Although the sound improved in a number of ways (more shape and texture to the bass, more detail and complexity to the piano and drums), the overall coherence suffered. For the first time, we could appreciate just how disjointed the combination of rack, electronics and cables really was. The bass became totally detached, the drums lost their timing and the brass lines had no connection to the “rhythm” at all.
STEP 3
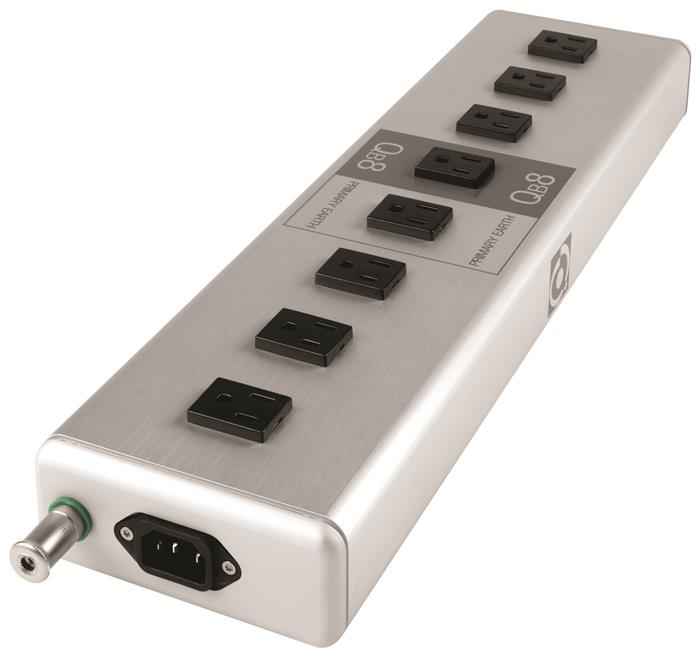
We changed to the second set of electronics, positioned on a carefully leveled Quadraspire Q4 Evo rack and wired up with a complete set of Nordost Heimdall 2 cables, from wall socket to speaker binding posts, along with a Qbase QB8 distribution block. The top shelf of the rack, used for the CD player was made of MDF, while the other shelves were made of laminated and grooved bamboo.
This brought everything back together, locking the rhythm section into step, adding shape and emphasis to the brass lines. For the first time you could separate the two brass instruments, while the bass moved from plodding to setting the tempo. The improvement in temporal, spatial and musical coherence was huge; the band might have sounded smaller and more compact, but at least they were all in the same space, playing the same tune at the same time.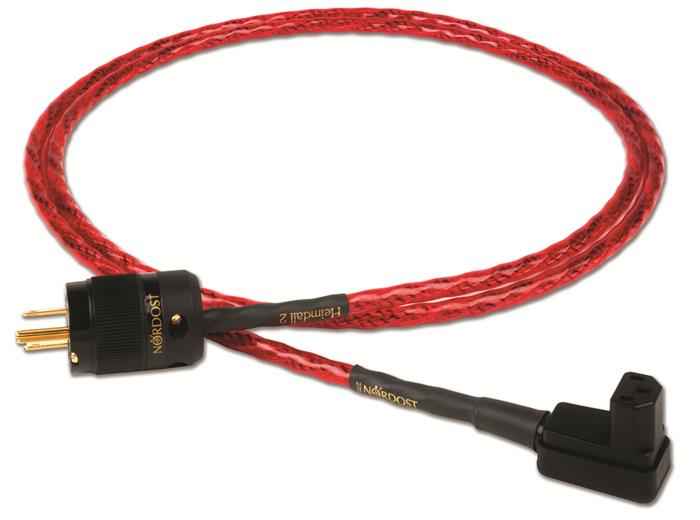
STEP 4
We placed three small hardwood blocks under each of the electronics, by-passing the feet and improving their coupling to the supporting surface, allowing internally generated mechanical energy to escape from the chassis.
Providing an exit path for the internal energy cleaned up the signal dramatically. Separation and clarity of the instruments improved dramatically, as did their dynamic range and the crispness of the playing. It simply sounded like a better band having a lot more fun.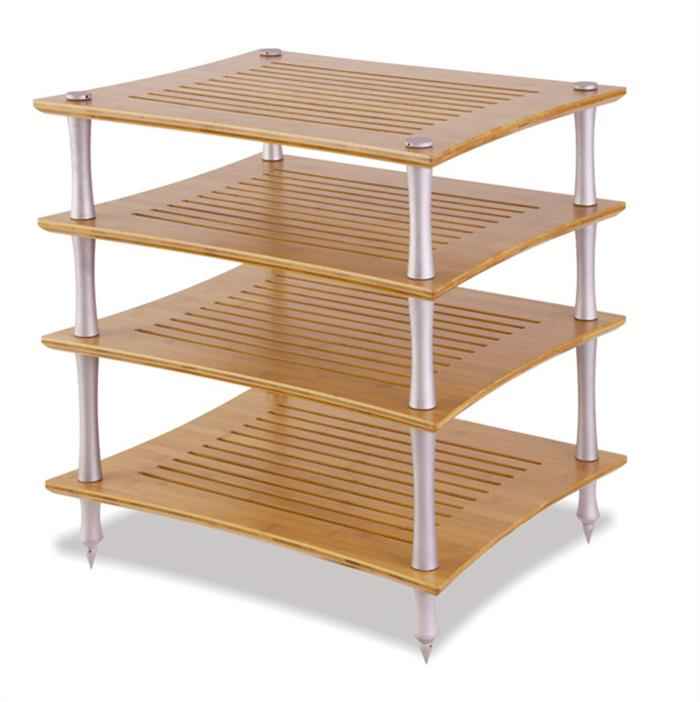
STEP 5
We moved the CD player (along with its three wood blocks) from the top, MDF shelf, down one step to a bamboo shelf, showing just how important the supporting shelf becomes, once you couple the equipment properly.
Cleaning up the signal generated by the CD player brought an even crisper quality to the sound and playing. What had originally seemed sluggish and lazy when we first played it now had an incisive, directed quality, a sense of progress and purpose that made it much more engaging and musically relevant.
TRACK CHANGE
Having established a good, basic foundation (mechanical and electrical) for the system, we once again changed tracks, this time to highlight differences in the next step –
Shawn Colvin – The Facts About Jimmy [A Few Small Repairs, Columbia 454327 2] is a good, studio pop recording. It is more complex, more dynamic and requires more obviously expressive qualities than the Art Pepper track.
STEP 6
We replaced the wood blocks with trios of Stillpoints Mini Ultras. These not only improved the coupling of electronics to shelves, but increased the consistency of support, with Stillpoints technology now being used under both the electronics AND the loudspeakers.
This was a big change! Having established a decent foundation (mechanical and electrical) for the system, we could start to build on and exploit that stability. The vocals were much more natural and expressive, the drummer was now clearly human (rather than a drum machine) and the sheer space and variety of instruments present in the recording was far more obvious, adding scale and texture to the music. The whole experience was louder, closer with greater musical and emotional impact.
STEP 7
We took the last step in the support chain, raising the Qbase distribution unit onto three Stillpoints Ultra 5s, placing a mechanical drain between the mechanical energy carried on the electrical grid and the electronics themselves.
This was a bit of a cheat! The impact was even greater than the previous step, bringing a whole new level of musical and emotional expression to the track, as well as far more organic, natural feel to the voice, instruments and playing. For the first time you started to feel the hollow sadness and loneliness that sits at the centre of this song.
Why the fundamental improvement? Because, by draining the mechanical energy generated by the grid out of the distribution block, we are stopping it reaching the whole system – so the improvement impacts the performance of all the electronics at once. The fact that they were already supported on the Stillpoints Mini-Ultras simply allowed us to hear the impact that much more clearly. In practice, the distribution block is actually the first element in the system you should support (after the loudspeakers).
STEP 8
Having improved the mechanical grounding in the system, we next did the same for the electrical supply. To do this we ran a ground wire from the star ground terminal on the Qbase to an Entreq Tellus ground block.
The resulting drop in the noise floor was just like using the fine-focus ring on a camera – everything snaps into place. A grey haze or grain was removed from the soundstage, bringing clarity and increased dynamic contrast. The ability to hear far more clearly just where notes started and stopped brought an added sense of purpose and intent to the music. The musicians started to really work with the voice, adding accent and emphasis to the lyric. For the first time it became really obvious that the song is written in a minor key, the downbeat sadness and emotional desolation finally becoming fully apparent. The Entreq block is a relatively expensive, standalone grounding solution, but a ground wire run from the QB8 to an external ground post, sunk in the yard will deliver even better results – for the cost of a few dollars. That’s not possible in a hotel room at TAVES – or in many apartments – hence the use of the Entreq Tellus.
TRACK CHANGE
With the system starting to sound considerably better, it was time, once again to show what it wasn’t doing. We changed tracks to Joe Cocker – Many Rivers To Cross [Sheffield Steel, Mobile Fidelity UDCD 631] which contains an exposed, rasping vocal, massive space and atmosphere and a deep, deep rhythm track that stresses the system at completely different points in its range. Cocker’s voice was distant, lost in the swirling aural backdrop, while the bass was overpowering, loose and wallowy. All told – a complete musical disaster.
STEP 9 – The really big one!
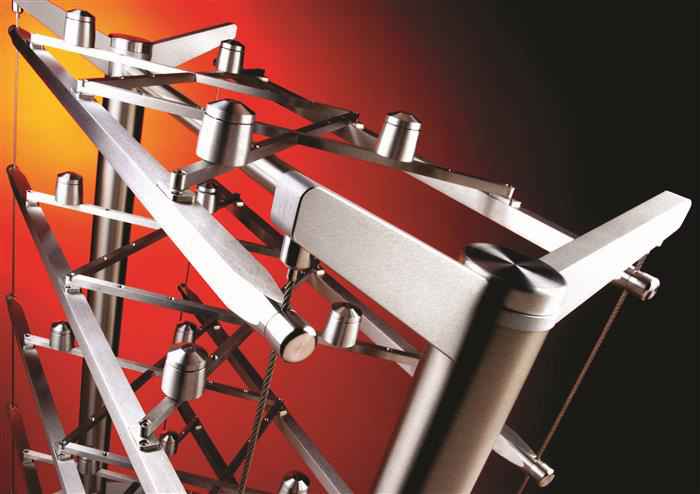
We now moved the whole set of electronics from the Quadraspire rack to the Stillpoints ESS, fitted with Ultras and the new Grids. This not only increased the sophistication and degree of mechanical draining, it eliminated the shelf material altogether.
This was the biggest single system change that we showed. The increase in scale was dramatic. The wind noise and organ track that make up the musical backdrop were separated and independent. The voice stepped forward, losing its edgy, nasty quality. The bass went much deeper and now you could tell that its fat, rounded shape wasn’t just intentional, it was in the right place too. Timing improved dramatically as a result, the slow, carefully spaced opening adding pathos now, rather than simply boring the listener. This really was the difference between music and noise.
Why the big difference? If the Quadraspire offered a firm foundation, the equivalent of a trench filled with concrete, the Stillpoints ESS is like sitting the system on pilings, sunk straight down to the bedrock. The really good news is that now, each and every small change will deliver an improvement out of all proportion with expectations.
STEP 10
We replaced the internal, hardwired links on the KEF Blades with a set of Nordost Norse Series bi-wire jumpers.
By extending the Micro Mono-Filament technology a further four inches, we tied together the crossover, bringing added coherence to the music. Cocker’s voice became more natural again, with added texture and detail (making it easier to hear not just what he was singing, but how he was singing it too) while the separation of bass guitar and drums was far more apparent.
STEP 11
We added a clean signal ground, by linking the outer ring of an unused RCA input on the pre-amp to a second Entreq grounding box – in this case a Silver Tellus.
This resulted in another drop in the noise floor, resulting in more natural tonality, timing and far more expressive playing. The backdrop became more effective, as did the contrast between the stark opening and the deep, powerful bass.
STEP 12
We ran two more wires, from bottom front left and top rear right corners of the rack to the Silver Tellus, thus creating a Faraday Cage around the equipment to help eliminate RF interference.
This resulted in the removal of yet another layer of grunge, this time bubbling up from the bottom of the music/soundstage. Now you could finally hear the bottom of the bass guitar notes, appreciate the changes in pitch and placement and just how agile the playing really is. The complexity and solidity of the drum patterns became fully apparent, as did the swirling expanse of the opening section.
STEP 13
We added a pair of QRT Qx4 field generators to the system, positioning one each behind the speakers.
By acting on the linearity of the fields in the drivers’ motor assemblies, the effect of the Qx4s is to allow them to start and stop more quickly and precisely – which is exactly what it sounds like. Every aspect of the music became crisper and more incisive, adding purpose and impact to the song, finally really revealing that this is a great singer, backed by a great band and captured on a great recording.
Each step of the way, the music had stood further and further away from the speakers; now, they’d completely disappeared. All you heard was the song – rather than the system playing it.
STEP 14
Finally, it was time to demonstrate the impact of the Leading Edge acoustic panels we’d used to treat the room – by simply removing them!
This was the other real shocker for the audience. Having got the system really singing, simply walking the Leading Edge panels out of the room reduced it to a messy, confused and disjointed mess, destroying all the good work that we’d done. The simplicity and effectiveness of these panels was possibly the most telling lesson of the whole seminar – and certainly the one that generated the most questions.
STEP 15
With the Leading Edge panels re-installed, it was time to revisit the original tracks we’d played, but each with a wrinkle…
The Art Pepper track really clicked now, but when we added a pair of LPI record weights to the top of the CD player and pre-amp, it lifted it yet another notch. Now the band was really cooking, the dirty, grinding groove of the track finally emerging. This is the APQ at their finest, a reputation you could now appreciate, a performance likewise.
STEP 16
Cat Stevens – including a small demonstration of the deleterious impact of remote operation on the system. I’m not even going to attempt to explain this one, but starting the track from the player front-panel (as opposed to using the remote control) results in a significantly more natural, more communicative and more immediate sound. If your system is working properly, you’ll hear this instantly. If you don’t, you know you have some work to do…
STEP 17
The Buddy Holly, but also Rachmaninoff – Symphonic Dances [Johanos, Dallas S.O. Analogue Productions APCD 006]. These tracks were used to show just how effectively the system now handled scale, and how independent the soundstage and presentation was from the speakers.
Finally, STEP 18
A return to the system as originally heard. Oh dear – ‘nuff said!
By returning the system to its original state, and using a large scale piece with a big, coherent soundstage, we really showed just how much performance we’d lost, the music completely collapsing, spatially, rhythmically, but most importantly of all, in terms of emotional and musical engagement.
If the idea of any audio system is to bring the musicians and their performance into your home, this seminar showed just how critical set-up and support really is to that goal. The vast gulf in communication, the total loss of the convincing musical presence we’d established really brought home just how significant the changes we’d made actually were; all without replacing a single component.
But even more remarkable was the fact that we were demonstrating these huge differences on a system, set up in a hotel room and being ripped apart and totally rebuilt every other hour. In a domestic environment with a more stable set-up and far fewer electrical and acoustic issues, the differences will be even greater. Until you have heard just how big the impact of system infrastructure (supports, grounding, AC integrity, cable consistency and speaker placement) is, it’s hard to credit. But given that few systems apply even half of the things that we demonstrated in the seminar, it’s safe to say that most systems are a long way from delivering the performance they could. The good news is that realizing that performance is much more to do with time and technique than it is to do with money. Spent carefully, with purchases guided by a clear strategy, even modest sums invested in your system’s infrastructure will deliver astonishing returns. Hi-fi started out as a hobby and it has become a mainstream consumable: it really is time to roll your sleeves up once again – you’ll be glad that you did.
About the Author: admin
Related Posts


27 Comments
Comments are closed.
… [Trackback]
[…] Here you can find 12807 more Info to that Topic: novo.press/how-to-setup-and-optimize-your-audio-system/ […]
… [Trackback]
[…] Find More here on that Topic: novo.press/how-to-setup-and-optimize-your-audio-system/ […]
… [Trackback]
[…] Information to that Topic: novo.press/how-to-setup-and-optimize-your-audio-system/ […]
… [Trackback]
[…] Information to that Topic: novo.press/how-to-setup-and-optimize-your-audio-system/ […]
… [Trackback]
[…] Find More here on that Topic: novo.press/how-to-setup-and-optimize-your-audio-system/ […]
… [Trackback]
[…] Read More Information here to that Topic: novo.press/how-to-setup-and-optimize-your-audio-system/ […]
… [Trackback]
[…] Find More here to that Topic: novo.press/how-to-setup-and-optimize-your-audio-system/ […]
… [Trackback]
[…] Read More here on that Topic: novo.press/how-to-setup-and-optimize-your-audio-system/ […]
… [Trackback]
[…] There you can find 9676 more Info on that Topic: novo.press/how-to-setup-and-optimize-your-audio-system/ […]
… [Trackback]
[…] Find More Info here to that Topic: novo.press/how-to-setup-and-optimize-your-audio-system/ […]
… [Trackback]
[…] Read More here on that Topic: novo.press/how-to-setup-and-optimize-your-audio-system/ […]
… [Trackback]
[…] Find More Info here to that Topic: novo.press/how-to-setup-and-optimize-your-audio-system/ […]
… [Trackback]
[…] Find More Information here to that Topic: novo.press/how-to-setup-and-optimize-your-audio-system/ […]
1financier
x4 gay video chat https://bjsgaychatroom.info/
free gay phone chat https://gay-buddies.com/
gay chub chaser dating sites https://speedgaydate.com/
real money slots https://2-free-slots.com/
free slots online games https://pennyslotmachines.org/
ceasars slots https://slotmachinesworld.com/
slots https://slotmachinesforum.net/
big win vegas slots https://slot-machine-sale.com/
total slots at cashcreek https://411slotmachine.com/
fa fa fa slots https://www-slotmachines.com/
konami slots riches https://slotmachinegameinfo.com/
jill biden dissertation https://buydissertationhelp.com/
tips for writing dissertation https://dissertationwriting-service.com/